This article shows how to configure your Microsoft 365 account for email follow-up. The email follow-up option lets you continue your conversation via email with your prospect to increase your chances of conversion.
To Get started, go to the Settings Page, and scroll down to the Email Settings section; Select Microsoft 365 from the Dropdown option and follow the guide below to complete the setup process;
How to Configure your Inbox for Microsoft 365
Step 1: Go to Admin Portal, Then Azure Active Directory
To do this you will need to:
1. Click Settings within the inbox
2. Click Admin Center
3. Click show all within the admin center
4. Click Azure Active Directory
5. Then scroll down find the properties tab
Here's a recording of how to do this.
Step 2: Adjust Admin Properties
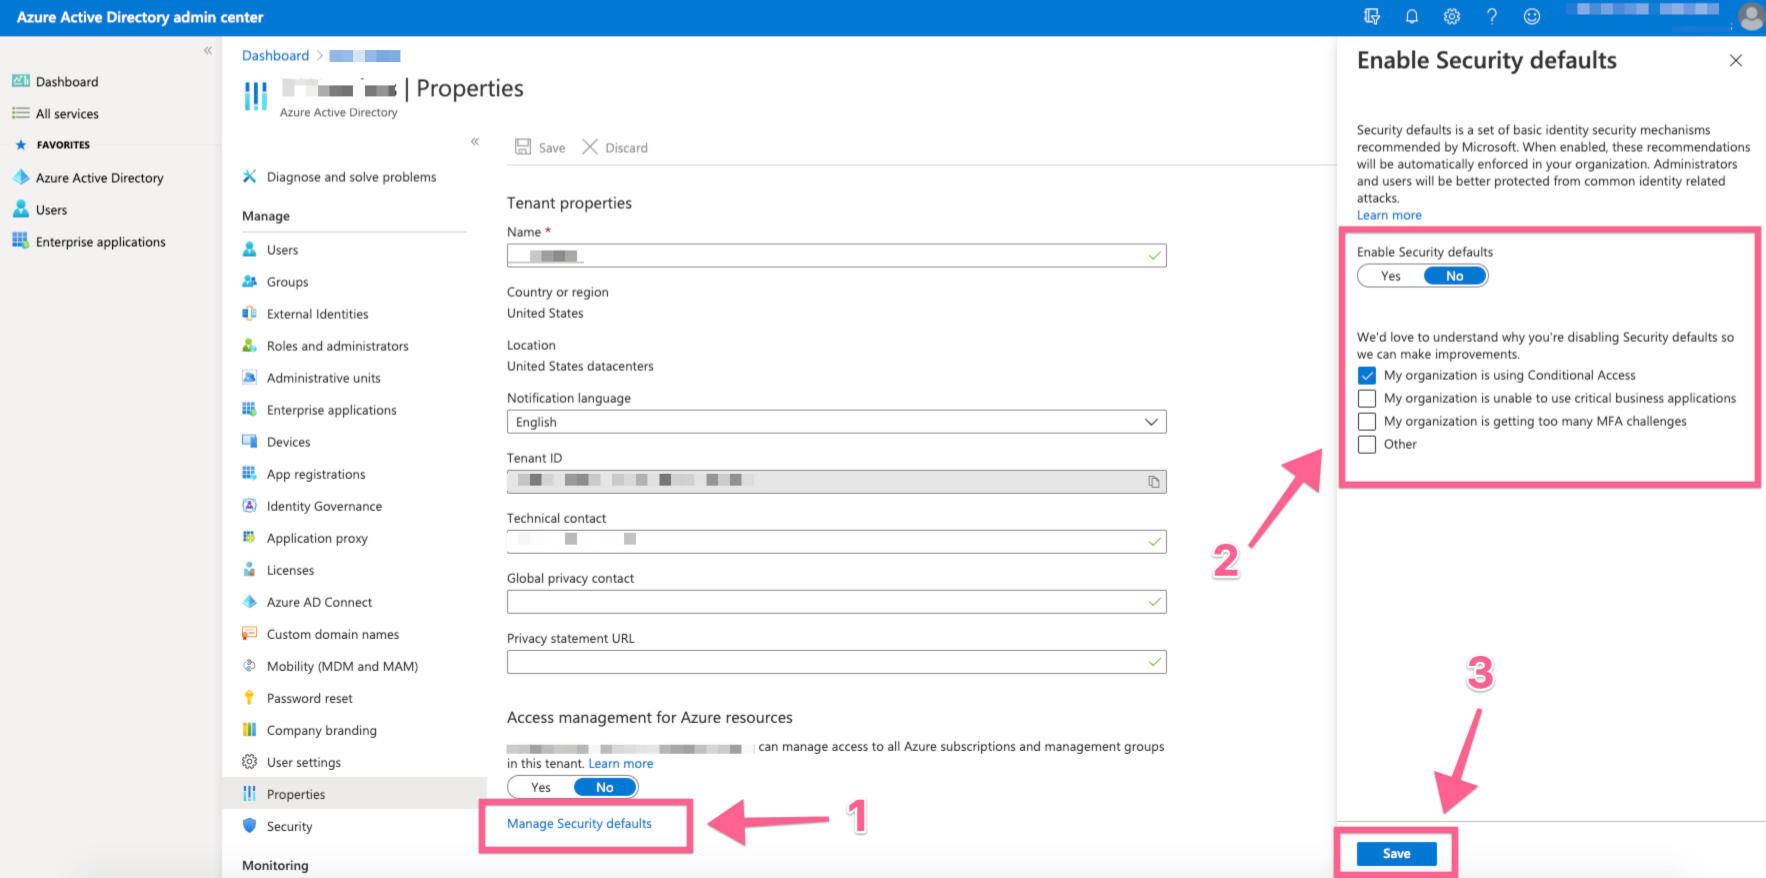
Within the admin properties section you will need to Enable Security defaults to No.
To do this click "Manage Security Defaults" then click No within the right hand slider window.

Step 3: Allow The Inbox To Use SMTP & IMAP
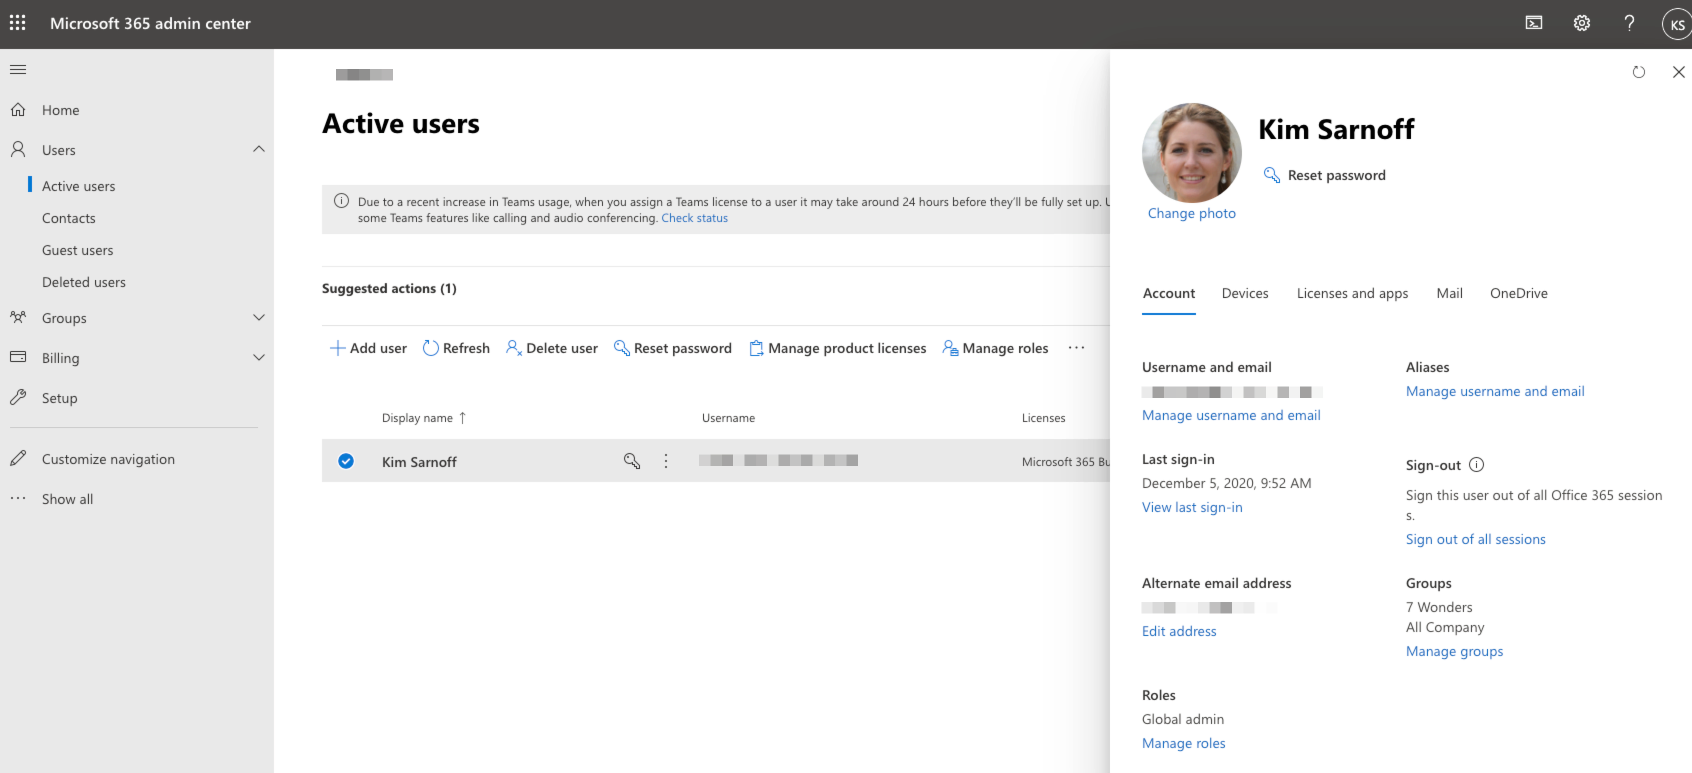
A. First go back to the Admin Center and select Users > Active Users

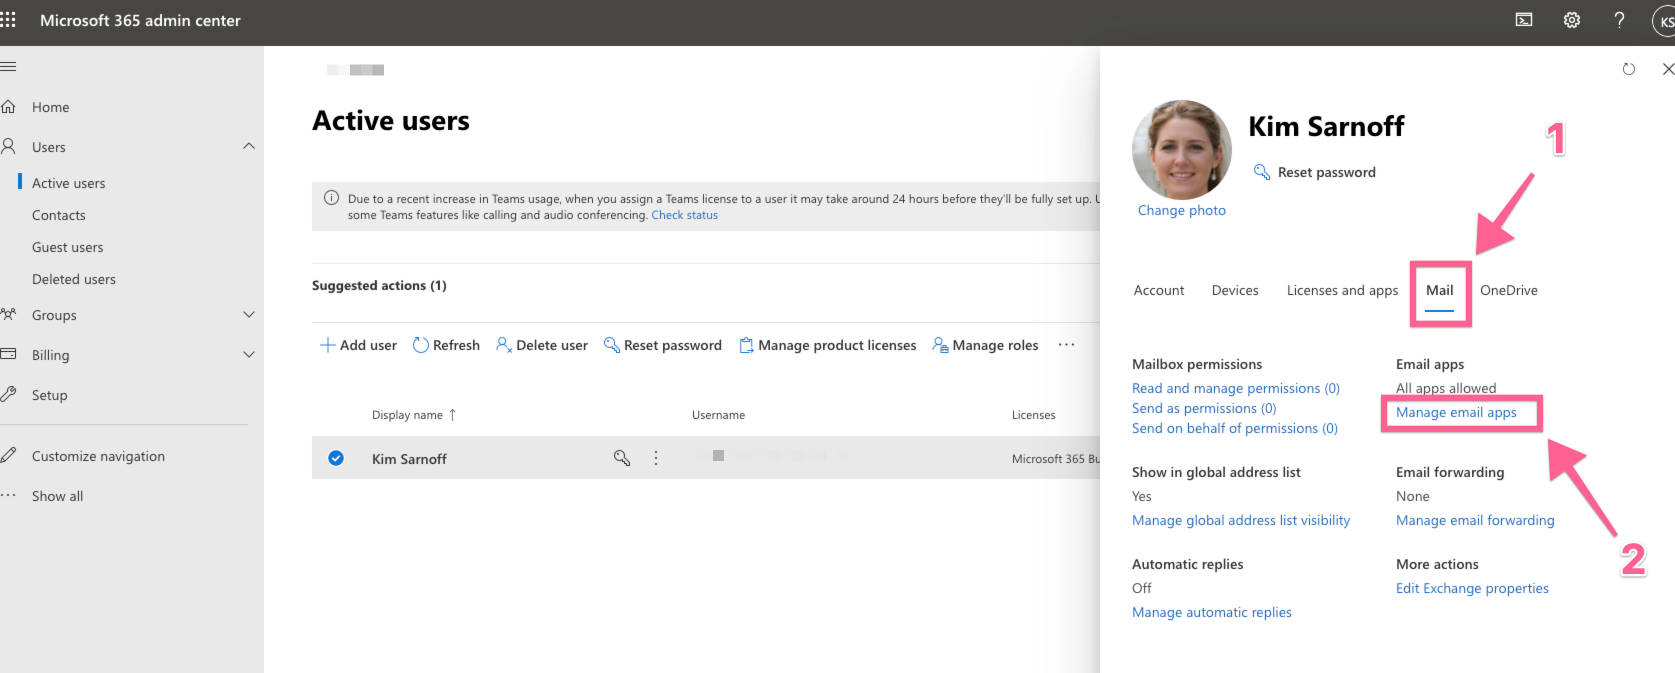
Select the inbox that you want to add to Warmup Inbox. By doing this a slider will come out like this:

Select the Mail tab within the slide and click Manage email apps

Make sure IMAP and Authenticated SMTP is checked.

Congrats!, you'll now be able to use Email follow-up in sequence.

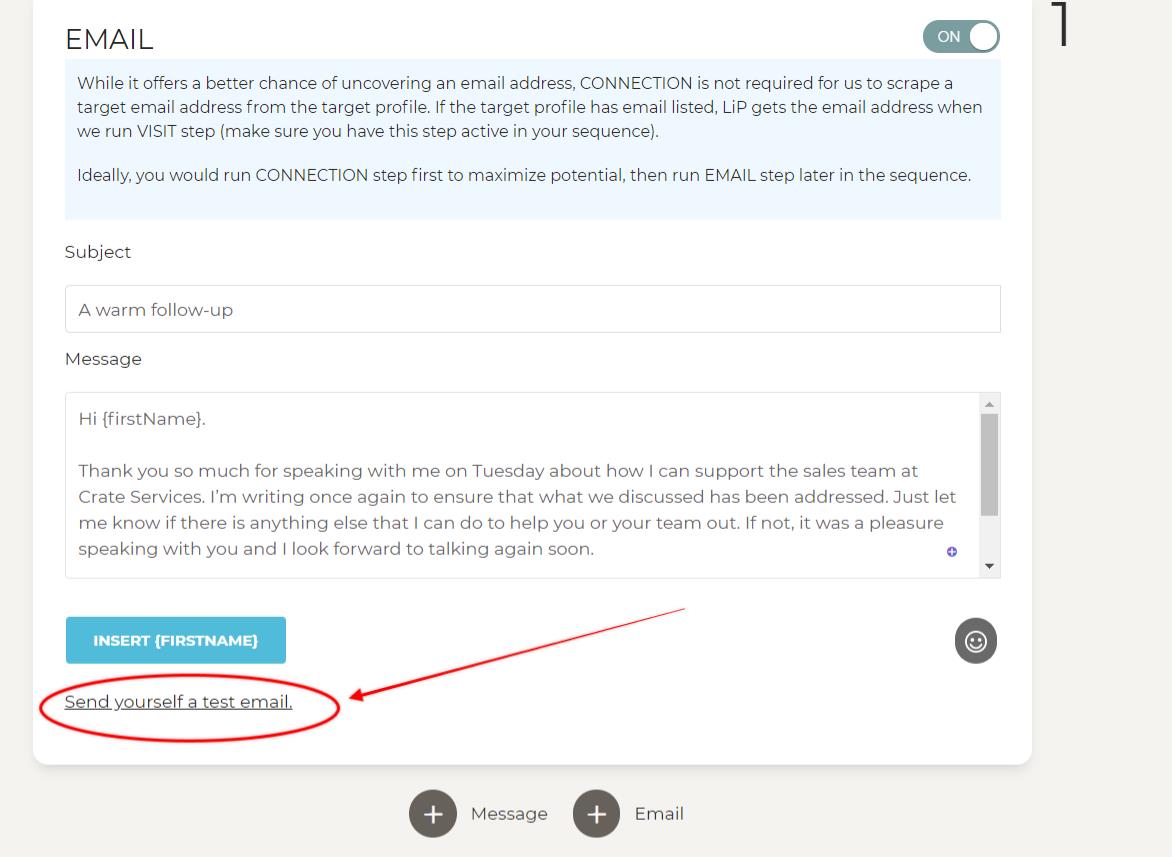
To ensure you've set up everything correctly and your email is well written to your taste, always use the "Send yourself a test email" when creating any sequence.

